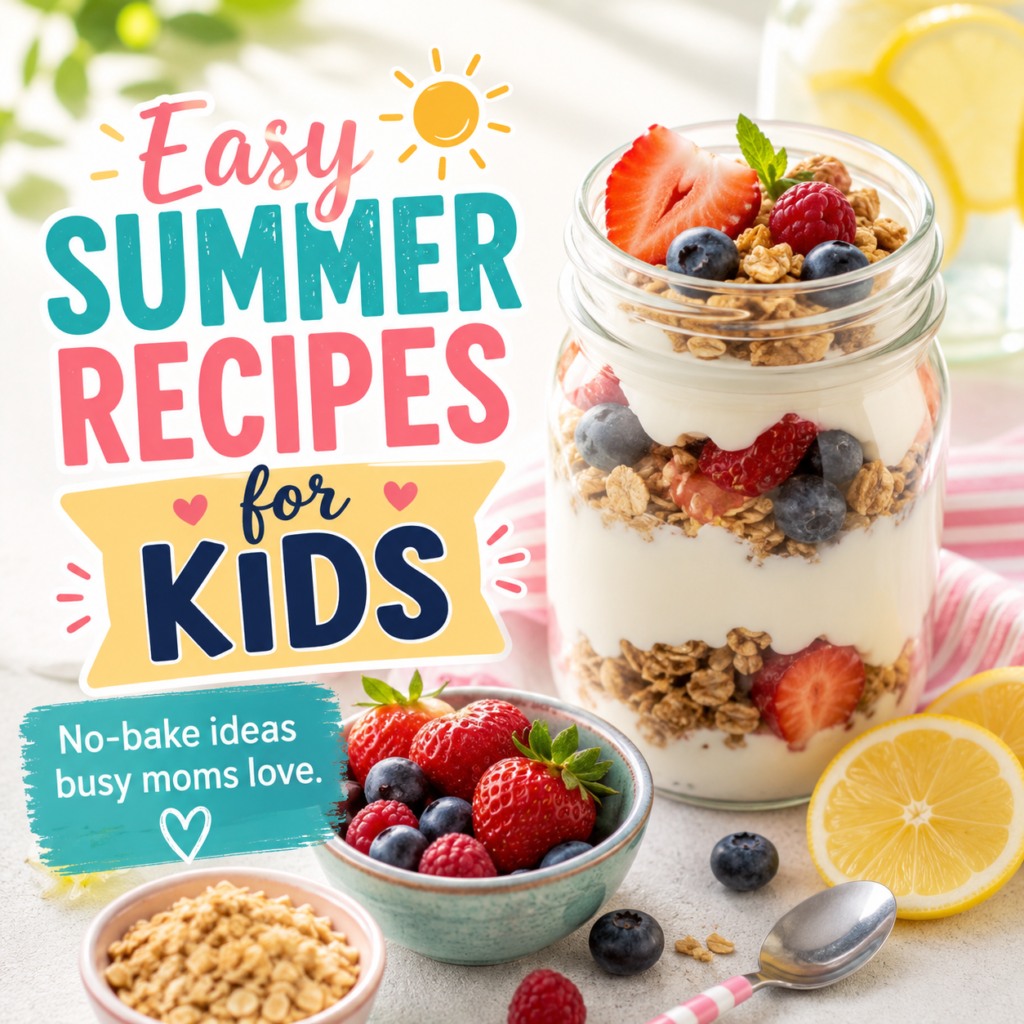
Easy Summer Recipes for Kids: 10 Fun, No-Bake Recipes Busy Moms Can Make All Summer Long

By a mom who has made all the mistakes so you don’t have to
Okay, can we just be real with each other for a second?
Every single May, I sit on my porch with my coffee, the weather is perfect, the kids are still in school, and I think: this summer is going to be different. I’m going to have a clean kitchen. I’m going to make homemade lunches that look like something from Pinterest. We’re going to eat fresh fruit on the porch and everything is going to feel like a lemonade commercial.
And then June 3rd hits and somebody is asking for their fourth snack by 9:47 in the morning and I’m standing in front of the fridge in yesterday’s ponytail wondering how this happened again.
Sound familiar? Good. You’re in the right place.
This post is not about making summer look beautiful. It’s about making summer survive-able. These are the real, actual recipes I reach for when the days get long, the kids get loud, the kitchen gets hot, and I need something fast that won’t make me feel like a failure. They’re simple. They’re colorful. They’re mostly no-bake. And honestly? The kids love them.
So grab whatever is left in your fruit drawer, pull out your blender, and let’s talk about ten summer recipes that are genuinely worth keeping.
Quick note: This post contains affiliate links, which means I may earn a small commission if you purchase through my links — at no extra cost to you. I only ever share things we actually use and love in our house. Thanks for supporting this little corner of the internet!
One thing I grabbed this summer that I genuinely can’t stop recommending to other moms: this 28-piece kids’ kitchen knife set. It has been an absolute game changer for getting my kids involved in the kitchen. We’re talking real kid-safe knives, a cutting board, crinkle cutters — everything in one set, designed for ages 2 to 10. My kids feel like they’re actually cooking (because they are!), and I don’t spend the whole time hovering and nervous. So many of the recipes in this post have kid-friendly prep steps, and having the right tools makes all the difference. Highly, highly recommend if you want your little ones helping in the kitchen this summer.
First, Let’s Talk About Why Summer Eating Is Its Own Beast
You might think, hey, school is out — this should be easier. And in some ways it is. You’re not packing lunches at 6:45am. You’re not fighting over who forgot their water bottle. But what you now have, in its place, is an all-day grazing situation that nobody fully prepared you for.
When my kids are home all summer, the snack requests start before I’ve even had a chance to finish my coffee. And then they want something else an hour later. And then again. The kitchen becomes a revolving door of peanut butter jars and fruit peels and someone who wants to know where the good crackers are hiding.
This is totally normal, by the way. Kids burn more energy in the summer — they’re running around outside, swimming, bouncing, being completely feral in the best way possible. They need more fuel. But that doesn’t mean you need to be standing at the stove all day making it happen.
Here’s what I’ve learned after a few summers of figuring this out:
You need a short list of reliable recipes. Not thirty recipes. Not a whole cookbook. Just eight to ten things you actually make, that your specific kids actually eat, that use ingredients you usually have. That’s it. That’s the secret.
Everything on this list fits that description. Each recipe is simple enough to repeat all summer long, flexible enough to work with whatever fruit you have, and fun enough that the kids feel like they’re getting something special.
Let’s get into it.
1. Yogurt Fruit Parfaits
If there is one recipe on this entire list that I could not live without, it’s this one. Yogurt parfaits have been my summer MVP for three years running. They work for breakfast, mid-morning snack, afternoon snack, and even dessert if you let the kids put enough granola on top. They take about four minutes to make. And they look adorable in little mason jars, which means I feel slightly accomplished even before 8am.
Here’s the thing nobody tells you about parfaits: there is no wrong way to make them. You’re layering yogurt and fruit and something crunchy. That’s it. The rest is just vibes.
What You’ll Need (serves 4):
- 2 cups vanilla or Greek yogurt (I use vanilla for picky kids, Greek for everyone else)
- 1 cup strawberries, sliced
- 1 cup blueberries
- 1 banana, sliced
- 1 cup granola or crushed graham crackers
- Honey, optional but highly recommended
How to Make It:
- Grab a cup, jar, or bowl — whatever you have clean right now, no judgment.
- Add a spoonful of yogurt to the bottom.
- Add a layer of fruit.
- Sprinkle in some granola.
- Repeat the layers until you run out of room or patience.
- Drizzle with honey if you’re feeling fancy.
- Serve immediately so the granola stays crunchy.
Real Mom Tips:
If you’re making these for a crowd or prepping them ahead of time, keep the granola completely separate and let everyone add their own right before eating. Soggy granola is a crime against parfaits, and I will not stand for it in my house.
Also — if your kids are obsessed with the layers looking “right,” this is actually a great recipe to hand over to them. My eight-year-old thinks she’s basically a chef when she makes parfaits, and honestly, watching her be proud of something she built herself is one of my favorite things about summer.
You can also turn these into a parfait bar situation. Set out small bowls of different fruits, a couple of yogurt options, some granola, maybe some mini chocolate chips, and let everyone build their own. This works great for playdates and keeps you from making six different individual requests. One setup, everyone happy. Done.
2. Frozen Yogurt Bark
I’m going to say something bold: frozen yogurt bark might be the easiest recipe I have ever made in my entire life. And I’m including toast in that ranking.
Here’s all it is: you spread yogurt on a baking sheet, put fruit on top, freeze it, and break it into pieces. That’s the whole recipe. It looks like something you’d find at a fancy bakery. It tastes like a cold, creamy, fruity dream. And the kids act like you did something impressive, which is always a mood.
What You’ll Need:
- 3 cups Greek yogurt
- 2 tablespoons honey or maple syrup
- 1 teaspoon vanilla extract
- 1 cup strawberries, sliced thin
- 1 cup blueberries
- 1/2 cup granola or mini chocolate chips
- Optional: coconut flakes, rainbow sprinkles for a fun twist
How to Make It:
- Line a rimmed baking sheet with parchment paper. Do not skip the parchment paper. You will regret it.
- Stir together the yogurt, honey or maple syrup, and vanilla until smooth.
- Spread the yogurt mixture into an even layer on the baking sheet. It should be about 1/4 inch thick — not too thin, not too thick.
- Scatter your fruit and toppings evenly over the top. Get artistic here. Make it pretty. Let your kids do it. Whatever.
- Pop it in the freezer for at least 2 to 4 hours, or until completely solid.
- Break into irregular pieces and serve straight from the freezer.
- Keep leftovers in a freezer bag — it stores beautifully for up to two weeks, though it never lasts that long in my house.
Real Mom Tips:
This is the perfect recipe for fruit that needs to be used up. Got strawberries that are one day away from going bad? Peaches that are getting soft? Mango you forgot about? Bark them. Freeze the evidence. No waste, no guilt, everyone wins.
Also, if your kids like helping in the kitchen, this is one of the best recipes to involve them in because there is truly nothing that can go wrong at the decorating step. Let them go wild with the toppings. Sprinkles? Sure. Mini M&Ms? Why not. Crushed Oreos? Look, I’m not here to judge your summer.
3. Banana “Ice Cream”
The first time I made banana ice cream, I didn’t tell my kids what it was. I just put a bowl in front of them and said “here’s your ice cream.” They ate the whole thing. Then I told them it was just frozen bananas, and they were both horrified and impressed, which is honestly the best possible reaction.
This recipe is magic. Four frozen bananas in a blender becomes something genuinely creamy and delicious, no dairy, no added sugar, no ice cream maker needed. It tastes like a soft-serve situation and it’s ready in five minutes if you remembered to freeze your bananas the night before.
What You’ll Need (serves 4):
- 4 ripe bananas, sliced and frozen (the riper the better — those sad spotted ones on your counter? Perfect for this)
- 1 to 3 tablespoons milk (any kind), only if your blender needs help
- 1 tablespoon peanut butter (optional but highly recommended)
- 1/2 teaspoon vanilla extract (optional)
- Toppings of your choice (see below)
How to Make It:
- The night before (or at least 4 hours before): slice your bananas into rounds and freeze them in a single layer on a lined baking sheet. Once frozen, you can transfer them to a zip-top bag.
- When you’re ready: add the frozen banana slices to your blender or food processor.
- Blend on high. It’s going to look crumbly at first — keep going.
- Add a splash of milk only if the blender is struggling. You want it as thick as possible.
- Add peanut butter or vanilla if using. Blend until everything is smooth and creamy.
- Serve immediately for a soft-serve texture, or freeze for another hour if you want it scoopable.
Topping Ideas for Kids:
- Mini chocolate chips
- Crushed graham crackers
- Sliced strawberries
- Rainbow sprinkles
- Honey drizzle
- Crushed peanuts
- A single maraschino cherry because they think it’s fancy
Real Mom Tips:
Keep a bag of sliced frozen bananas in your freezer all summer. This is genuinely one of the most useful things I do in June. Any time you have bananas getting too ripe, just slice them up and freeze them. Then banana ice cream is basically always 5 minutes away, which is extremely useful when someone needs a cold treat and you have nothing in the house.
You can also make flavored versions: add cocoa powder for chocolate, frozen strawberries for strawberry swirl, or frozen mango for a tropical twist.
4. Rainbow Fruit Skewers
Look, I know fruit skewers sound kind of basic. But hear me out — there is something about fruit on a stick that makes children lose their minds in the best way. My daughter will eat twice as much fruit when it’s on a skewer versus just sitting in a bowl. The presentation matters. Kids are little drama queens and I respect that about them.
Fruit skewers are also incredibly easy to customize, they’re great for parties, and they make your summer spread look like you have everything together even when you absolutely do not.
What You’ll Need:
- Strawberries
- Red grapes
- Pineapple chunks
- Watermelon, cubed
- Blueberries
- Green grapes or kiwi for color variety
- Wooden skewers (shorter ones are better for kids — look for 6-inch skewers)
How to Make Them:
- Wash all your fruit. Dry it so the skewers don’t get slippery.
- Cut everything into bite-sized pieces — small enough to eat in one bite without awkwardness.
- Thread the fruit onto the skewers, alternating colors as you go. Red, blue, yellow, green. Think rainbow. Think fun.
- Lay them out on a platter or tray.
- Chill in the fridge for 30 minutes if you have time — they’re so much better cold.
- Serve plain, or with one of the dips below.
Easy Dips for Fruit Skewers:
- Vanilla yogurt dip: 1 cup Greek yogurt + 1 tablespoon honey + 1/2 teaspoon vanilla. Stir and serve.
- Peanut butter dip: 1/4 cup peanut butter + 2 tablespoons honey + 1 to 2 tablespoons warm water to thin. Great for apple and banana versions.
- Cream cheese dip: 4 oz softened cream cheese + 2 tablespoons powdered sugar + splash of orange juice. This one is dangerously good.
Real Mom Tips:
If you have little kids who shouldn’t be handling pointed skewers, skip the skewers entirely and make fruit cups instead. Same fruit, same colors, little plastic cups, toothpicks if you want to be extra about it. Same experience, zero emergency room risk.
For parties, these look incredible arranged in a rainbow pattern on a platter. It takes about 10 extra minutes but people act like you catered the whole thing. Worth it every time.
5. The “Mom Magic” Snack Board
I have to be honest with you about snack boards: they are barely a recipe. They are just a collection of foods that you already have, arranged on a cutting board or tray in a way that makes it look like you tried.
And yet — they are the single most reliably successful thing I make all summer. The kids love them. Guests love them. They require zero cooking and very little thought. They are the charcuterie board of the under-10 crowd.
Here’s the basic idea: pick a mix of crunchy things, soft things, savory things, and one sweet thing. Put them all on a board. Add a dip or two. Call it lunch.
The Building Blocks:
Crunchy things:
- Crackers (goldfish, ritz, wheat thins, whatever)
- Pretzels
- Mini rice cakes
- Pita chips
- Carrot sticks
- Cucumber slices
- Celery sticks
Soft things:
- Cheese cubes or slices
- Deli meat rolls (turkey, ham, pepperoni)
- Grapes
- Sliced bananas
- Cherry tomatoes
Sweet things:
- Apple slices
- Strawberries
- Blueberries
- Dried fruit
- A few chocolate chips for the fun factor
Dips (pick one or two):
- Hummus
- Ranch dressing
- Peanut butter
- Yogurt dip
- Cream cheese
How to Assemble:
- Start with your dip — put it in a small bowl and set it toward the center or side of the board.
- Add your crunchiest items first (crackers, veggies) because they’re the easiest to arrange.
- Fill in the gaps with soft fruits and cheese.
- Tuck the sweet items into the corners so they feel like a little surprise.
- Stand back. Look at it. Feel proud.
- Let the kids destroy it.
Real Mom Tips:
This is a perfect clean-out-the-fridge meal. Whatever is about to go bad? Put it on the board. Half an apple? Board. Three crackers left in the box? Board. The last little bit of hummus? Board. This board will happily accept everything.
Also, for picky eaters: snack boards are genuinely magic for variety. When everything is separate and right there, kids are much more willing to try things. There’s no pressure, no mixing, no “it’s touching my other food” meltdown. Just a plate of options. My most resistant eater will eat things off a snack board that she’d refuse at a normal meal, and I have given up questioning it.
6. No-Bake Energy Bites
Okay, let me tell you about the first time I made energy bites. It was a Wednesday in July, it was roughly 900 degrees outside, both kids were in that desperate pre-lunch hunger zone, and I had zero desire to turn on the oven or stand over anything hot.
I made these. They took 15 minutes including the chill time. My kids ate six each. My husband ate four while pretending he wasn’t. I felt like I had finally won at something.
Energy bites are one of those recipes that sounds kind of fancy but is actually just stirring stuff together and rolling it into balls. They’re filling, they’re made of real ingredients, and they store in the fridge for a week — which means you make them once on a Sunday and have snacks ready for days.
What You’ll Need (makes about 24 bites):
- 2 cups old-fashioned oats
- 1 cup peanut butter (or sunflower seed butter for nut-free)
- 1/3 cup honey
- 1/4 cup mini chocolate chips
- 1/4 cup shredded coconut (optional)
- 1 teaspoon vanilla extract
- Pinch of salt
How to Make Them:
- Stir everything together in a large bowl until fully combined. It’ll look like a lot at first — keep stirring.
- Taste the mixture. Adjust sweetness if needed. Yes, tasting raw oat dough is allowed. You’re the mom.
- If the mixture feels too sticky to roll, pop it in the fridge for 10 to 15 minutes to firm up.
- Roll into balls about 1 inch in size — roughly a tablespoon of mixture per bite.
- Place on a parchment-lined baking sheet or plate.
- Refrigerate for at least 30 minutes before serving.
- Store in an airtight container in the fridge for up to a week, or in the freezer for up to 3 months.
Variations to Try:
- Swap chocolate chips for raisins, dried cranberries, or chopped dried mango
- Add 2 tablespoons of chia seeds or flaxseed for extra nutrition (they won’t notice, I promise)
- Use almond butter or cashew butter instead of peanut butter
- Mix in 2 tablespoons of cocoa powder for a chocolate version
- Roll finished balls in extra coconut flakes or mini chocolate chips
Real Mom Tips:
Make a double batch. Seriously. Energy bites are one of those things that disappear extremely fast, and the effort to make twice as many is maybe 10% more work. Freeze half of them and you’ll thank yourself in two weeks.
Also, this is a great recipe for involving kids who are old enough to measure and stir. My kids fight over who gets to roll the balls, which is one of those rare moments where they’re both occupied, doing something helpful, and I’m not being asked for anything. It’s deeply peaceful.
7. Homemade Fruit Popsicles
There is something deeply satisfying about handing your kid a popsicle that you made yourself. It feels like a small act of summer magic. And the beautiful thing is that homemade popsicles are SO much easier than people think.
You don’t need special equipment. You don’t need a fancy recipe. You basically need juice or pureed fruit, a mold or some paper cups, and a few hours of patience.
What You’ll Need:
- 2 cups 100% fruit juice OR fresh fruit blended smooth (mango, strawberry, and watermelon all work beautifully)
- Popsicle molds OR small paper cups + craft sticks
- Optional: small fruit pieces to add texture and visual interest
- Optional: a swirl of yogurt for creamy popsicles
The Basic Juice Popsicle:
- Pour juice or blended fruit into molds, leaving a tiny bit of space at the top (liquids expand when frozen).
- If you want fruit pieces inside, drop them in now — they look beautiful suspended in the juice.
- Insert sticks.
- Freeze for at least 4 hours, or overnight.
- To release: run warm water over the outside of the mold for 10 to 15 seconds and pull gently.
The Creamy Yogurt Swirl Version:
- Fill molds about halfway with juice or blended fruit.
- Add a spoonful of vanilla yogurt.
- Fill the remaining half with more juice.
- Use a toothpick to swirl slightly.
- Freeze as usual.
Flavor Combinations My Kids Love:
- Watermelon juice + whole blueberries frozen inside
- Mango puree + a little coconut milk (tropical dream)
- Strawberry lemonade + vanilla yogurt swirl
- Orange juice + Greek yogurt (like a creamsicle)
- Grape juice, plain and simple, because sometimes that’s all they want
Real Mom Tips:
If you don’t have popsicle molds, paper cups are perfect. Fill small cups about 3/4 of the way, cover with foil, poke a craft stick through the foil (the foil holds it upright while freezing), and freeze. When they’re done, peel away the cup. Works every time and you don’t have to clean anything.
Make a big batch on Sunday and store them in a gallon zip-top bag in the freezer. Pull one out whenever someone needs a cold treat. You’ll feel like the most prepared person on earth.
8. Banana Peanut Butter Bites
These little sandwiches are so simple that I almost didn’t include them, and then I remembered how many times I’ve made them this summer and reconsidered.
Banana peanut butter bites are basically banana slices with peanut butter in the middle and something crunchy on the outside. They’re filling. They’re satisfying. They feel like a treat but they’re basically just fruit and protein. And you can make a plate of them in about four minutes.
What You’ll Need (serves 4):
- 2 ripe bananas
- 1/2 cup peanut butter (or almond butter, or sunflower seed butter)
- 1/2 cup granola
- Mini chocolate chips, optional
- Honey, optional
How to Make Them:
- Slice bananas into rounds about 1/2 inch thick.
- Spread a thin layer of peanut butter on half the slices.
- If using chocolate chips, press a few into the peanut butter.
- Top each peanut butter slice with another banana slice to make little sandwiches.
- Roll the edges in granola, or just sprinkle granola on top.
- Place on a plate or small tray.
- Refrigerate for 10 minutes if you want them firmer — or serve immediately if someone is standing next to you saying they’re hungry.
Real Mom Tips:
For toddlers and younger kids, skip the sandwich step and just serve these open-faced — banana slice, peanut butter on top, a few granola pieces, done. Way less messy and honestly easier to eat.
You can also freeze these! Make a big batch, freeze them on a lined baking sheet until solid, then transfer to a bag. They become a slightly firmer frozen treat that’s great on hot days.
9. No-Bake Snack Bars
I’m a big fan of anything that can be made ahead, lives in the fridge or freezer, and can be pulled out on demand when the 3pm hunger wave hits. These no-bake bars check every single one of those boxes.
They’re made from dates, nuts, peanut butter, and a few pantry staples. They have a fudgy, chewy texture that kids tend to love, and they’re filling enough to actually hold someone over until dinner. Which, in July, might be the most important quality a snack can have.
What You’ll Need (makes 12 to 16 bars):
- 2 cups Medjool dates, pitted (if they’re very dry, soak in warm water for 10 minutes and drain)
- 3/4 cup cashews, almonds, or walnuts
- 1/4 cup peanut butter
- 1/2 cup shredded coconut
- 2 tablespoons cocoa powder
- 1 teaspoon vanilla extract
- Pinch of sea salt
How to Make Them:
- If your dates are dry, soak them in warm water for 10 minutes, then drain and pat dry.
- Add everything to a food processor.
- Process until the mixture comes together and starts clumping — it’ll take about 60 to 90 seconds. You want it to hold together when you press it between your fingers.
- Line an 8×8 or 9×13 inch pan with parchment paper.
- Press the mixture evenly into the pan. Use the bottom of a measuring cup or your hands — either works.
- Refrigerate for at least 30 minutes until firm.
- Lift out using the parchment, transfer to a cutting board, and slice into bars or squares.
- Store in the fridge for up to 2 weeks, or freezer for up to 3 months.
Real Mom Tips:
These bars are fantastic for the pool bag, the beach bag, or the “we’re going to be in the car for four hours” situation. They travel well as long as you keep them in a cooler or insulated bag. In truly hot weather they can get soft, so freeze them before a trip and let them thaw slightly on the way.
10. The Quickest Yogurt Cup You’ll Ever Make
I’m saving this one for last because it is the most gloriously simple recipe on this entire list. It is not impressive. It requires zero skill. But it earns its spot here because sometimes you need something RIGHT NOW and this is it.
A yogurt cup is a parfait with no layers and no apologies.
What You’ll Need:
- 1 cup of yogurt (whatever you have — vanilla, strawberry, plain, Greek, all fine)
- A handful of strawberries, halved
- A handful of blueberries
- A small handful of granola
- A drizzle of honey if the mood strikes
How to Make It:
- Put yogurt in cup.
- Put fruit on yogurt.
- Put granola on fruit.
- Add honey if desired.
- Hand to child.
- Done.
Real Mom Tips:
This is an excellent recipe to put your kids in charge of. Any kid old enough to pour and spoon can make a yogurt cup independently. Set out the components, show them once, and then step back. They will feel incredibly capable and you will have one less thing on your plate. True summer win.
The Big Picture: Summer Snack Strategy That Actually Works
Now that you have ten solid recipes in your back pocket, let me share a few bigger-picture tips that have genuinely made my summers easier.
Make a short list and actually write it down. At the start of June, I write down the eight or so snack recipes I plan to rotate through all summer. I tape it to the inside of a cabinet. When I’m at the grocery store, I stock for those eight things. When I don’t know what to make, I look at my list. It sounds almost embarrassingly simple, but having that shortlist eliminates so much mental load.
Keep your fruit ready to go. I spend about ten minutes every few days washing, slicing, and storing fruit in clear containers at eye level in the fridge. When the kids open the fridge and can see food immediately, they grab it. When fruit is buried or still in a bag, it gets ignored. Cut fruit in a clear container = my kids actually eat it. Every single time.
Freeze bananas aggressively. Any banana that’s past its prime goes straight to the freezer. Sliced bananas = banana ice cream anytime. Whole bananas = great for smoothies. You will always want these.
Keep the freezer stocked with one cold treat. Popsicles, yogurt bark, or frozen banana bites, just always have something cold ready to go. Hot day, kids melting down, cold treat: instant mood reset. Worth every minute you spend making it.
Let kids make their own snacks more than you think is possible. I was way too slow to realize how much my kids could handle. By age five, my daughter could assemble a yogurt cup by herself. By seven, she could make energy bites. By eight, she could put together a whole snack board. Every recipe on this list has kid-friendly steps, and involving them makes snack time both more fun for them and less work for you.
Give yourself full permission to repeat. These recipes are meant to be repeated. If your kids are obsessed with yogurt bark, make it three times in one week. There is no prize for variety for variety’s sake. Make the things that work and make them often.
A Note From One Mom to Another
Summer doesn’t have to be this big beautiful production. It doesn’t have to look a certain way or feel a certain way or match what you see on Instagram.
If your kids are fed, if the kitchen isn’t a complete disaster, and if at least one person is happy about what they’re eating — that is a successful summer food day. That is genuinely enough.
I hope these recipes give you a few easy answers for those moments when someone is hungry and you have approximately no energy and no plan. I hope something on this list becomes your go-to. I hope it makes your summer feel a tiny bit lighter.
And if you make any of these, I’d love to hear which ones your kids went crazy for. Drop a comment below — because honestly, nothing makes me happier than hearing that the banana ice cream officially fooled someone else’s kid too. 🍌
Happy summer, mama. You’ve got this.
Quick Reference: All 10 Recipes at a Glance
| Recipe | Time | Baking? | Kid Can Help? | Make Ahead? |
|---|---|---|---|---|
| Yogurt Fruit Parfaits | 5 min | No | Yes | Partially |
| Frozen Yogurt Bark | 15 min + 4 hrs freeze | No | Yes (decorating) | Yes – 2 weeks |
| Banana Ice Cream | 5 min + freeze | No | Yes | Yes – keep frozen bananas |
| Rainbow Fruit Skewers | 15 min | No | Yes | Yes – 1 day |
| Mom Magic Snack Board | 10 min | No | Yes | No – best fresh |
| No-Bake Energy Bites | 20 min + chill | No | Yes | Yes – 1 week fridge |
| Homemade Fruit Popsicles | 10 min + 4 hrs freeze | No | Yes | Yes – 2 weeks |
| Banana PB Bites | 10 min | No | Yes | Yes – can freeze |
| No-Bake Snack Bars | 15 min + 30 min chill | No | Older kids | Yes – 2 weeks |
| Quick Yogurt Cups | 2 min | No | Yes independently! | No – best fresh |